First of all expect to spend approx 250 hours plus on the project, as far as cost goes the sky is really the limit!
OK so here goes.....
First you're gonna need a donor bike just like this one..

So once you have purchased your intended victim you will need to take off all the plastics and the fuel tank
You should be able to sell most of this stuff to get some money back for your build... your gonna need all you can get ........ trust me!
THE FRAME MODS
OK so now the fun starts!
You will need a small grinder for the next bit.......
In order to lower the rear sub frame you will need to cut firstly where the upper tubes connect to the main frame and secondly on the lower tube on straightest section.

OK so now you've done it! Dont' be scared! You will now take approx 3-4 inches out of the lower frame section on the straightest part of the tube.

This rear frame section can now be re-attached making sure of course everything is lined and levelled, i used the frame section under the engine as my level line and made sure the top rail on the rear frame was exactly the same. This however isn't critical as you are not upsetting the actual geometry of the frame its just nice to be neat!


The frame once all welded and strengthened where needed ( weld one section of tube between the top rails just to be safe) is pretty much sorted, on the second version i fabricated a battery box which also housed the cdi box etc.

THE TANK
The fuel tank on both bikes came from an early (1980's?????) Honda CG125 Which will require a small amount of work underneath on the tap side in order for the tank to sit down enough to get it level with the rear frame rail, you will also need to move the mounting plate towards the rear as the tank is longer than the original. The original lugs on the frame for the fuel tank have to be removed as do the mount lugs on the new tank. Unfortunately i don't have any pics of this work but it will be obvious when you are there. Once fitted and leak tested of course! you can prep and paint it, i used a petrol tap from eBay with the correct thread and a cap from Honda with the all important vent! The little things!!!!!

THE SIDE PANELS
These were purchased from a company in the u.s called DC plastics and were reproductions originally for a 1975 Honda CR250 Elsinore.
You can find them here - http://www.dcvmx.com/

THE SEAT
The seat/rear cowling is without question the biggest headache on this build, the first version was a combination of a very cut-down cb900 and fiberglass with body filler.

Second time around i knew i couldn't do it this way again so made the whole thing from scratch.....


A piece of 2mm mild steel plate was then fabricated to fit inside the seat section, this plate will then be upholstered. Because of the shallow seat depth i recommend you use quite a high density foam similar to that used for garden kneeling pads.
So cosmetically you're getting there! You have to bear in mind i am only giving you the very basics of the build you will come across problems as i did ........ alot! But the idea of the bike the looks and workings will (hopefully) be laid out here.
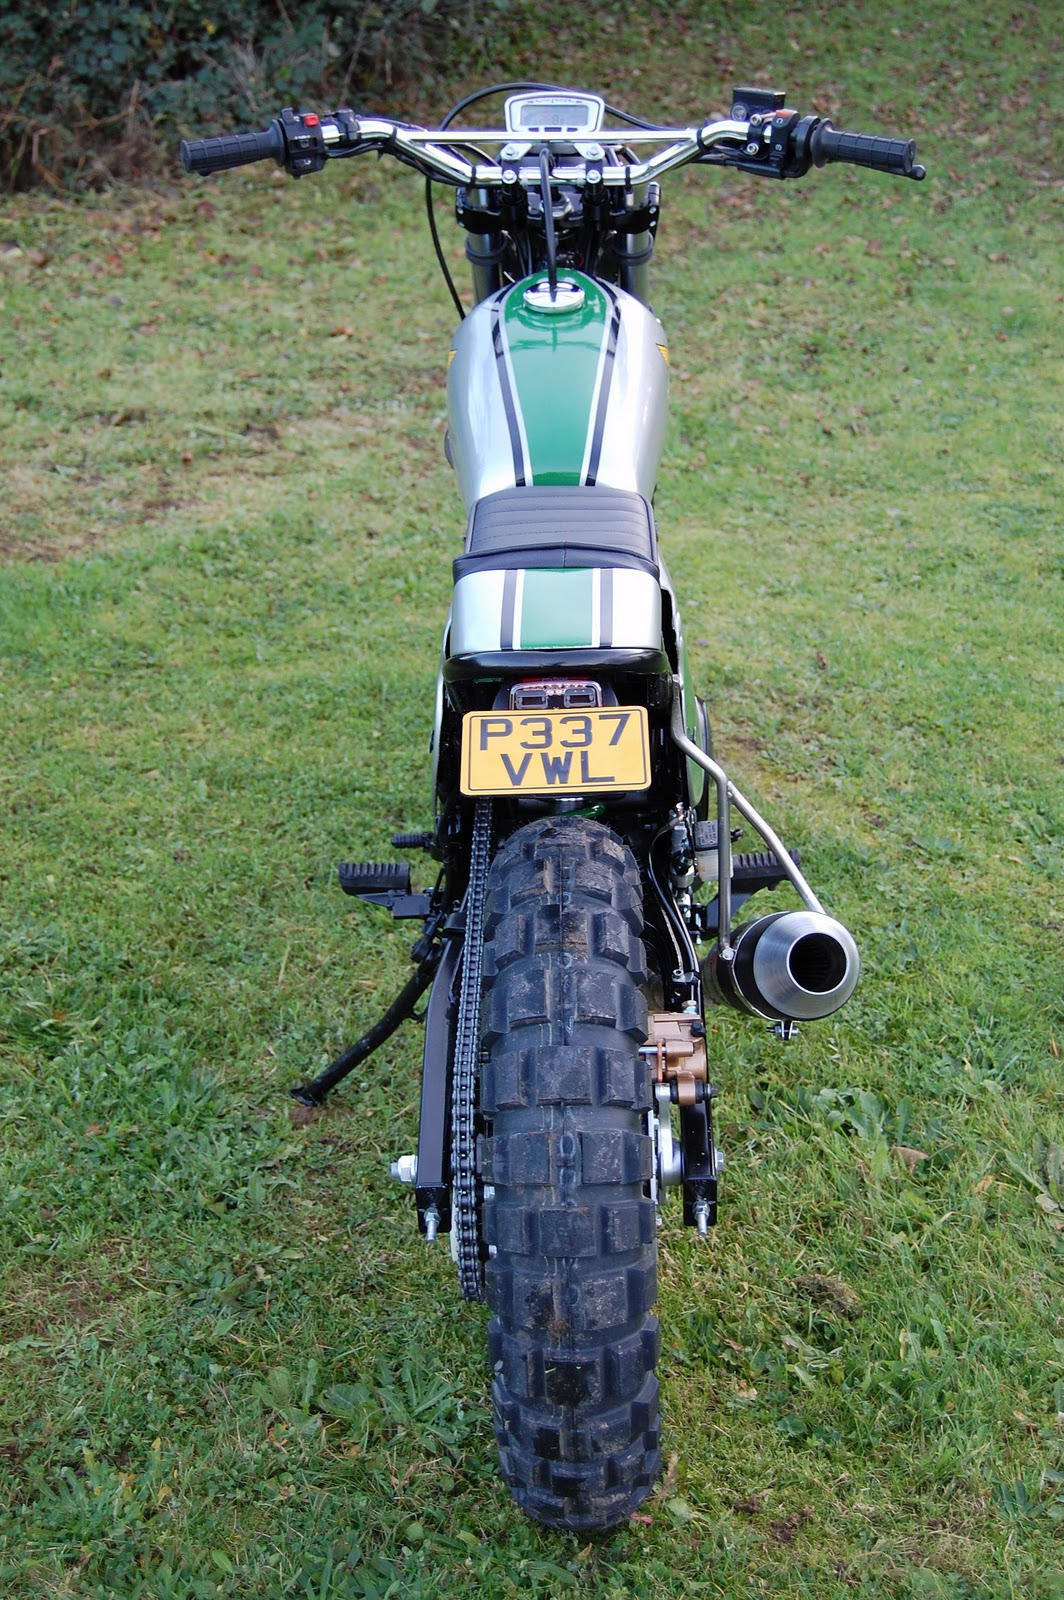
THE EXHAUST
One of the most important parts of this build was getting the right exhaust, i knew i wanted a down swept flat track type but nobody in the u.k made them. Further searching online got me to a company called Jemco based in Texas and Jon the owner was more than happy to supply me a very high quality item (took him long enough mind!)

Due to the long waiting time for Jon's expert services i enlisted the help from a more local exhaust company called Longlife who are normally tasked with fitting drainpipe sized back boxes for corsa's and saxo's but when i asked if they could build a similar pipe they agreed.
And in what must be record time they produced this...

I then added the finishing touches by way of a 4" to 2" reducer for the end , painted the silencer section (silencer ...yeah right!) and wrapped the rest with exhaust tape, cant quite remember the manufacturer but the colour was titanium and was not cheap but was the best colour (EBAY)
WARNING! this thing is VERY LOUD but so cool!
THE WHEELS
Rear wheel is standard 17" rebuilt spokes or just powder coat the whole thing as i did on version one choice is yours.
Front wheel is now a 19" this is achieved either by using the original hub and having a new 19" rim fitted or using a complete wheel from a Honda slr650 but you will have to use the SLR disc and caliper which i think 200mm bigger in diameter choice again is yours.
Tyres were another important decision again for the look and practicality and the Continental TKC80 twinduro were eventually chosen. These handle very well in the dry and are almost vibration free.
Sizes - rear 140/80/17 front - 120/90/19.
SUSPENSION
Both front and rear are completely standard and original, the front forks have 2 " spacers inside the leg and are removed via the cap at the top of the upper stanchion , doing this and pulling the legs through the yokes another 2" should be enough of a drop.
The rear drop has already been achieved by the frame so can be left alone.

BRAKES
Again all standard and original except for the Goodridge stainless braided lines for better looks and performance.

ENGINE
Up to you this one but if you bought a good bike to begin with then all you need do is paint it!
PJ1 satin engine paint was used and if you follow the directions to the letter you should be fine.

ELECTRICS
The majority of the dominators electrical components CDI, fuse box etc are housed in the now departed fairing. In order to keep the wiring at the headlight to a minimum i simply pulled everything back into battery area and lengthened the headlight power cables up to the headstock, all handlebar switches etc were left alone and this was the only alteration needed.... easy!!
The original clocks have also been thrown out and a very good replacement was the Trailtech vapour unit.
One of the many benefits here is the oil temp guage and of course it looks cool!

If you want to use the original socket on the top yoke for the ignition switch you will have get one from another bike as the dominator one is too tall, i used a Honda cb600f 1997 model and it fitted perfectly.
The headlight again was important for looks as well as practicality and the first version used a unit from Trailtech with the second version coming from Baja Designs both were 8" racelights using H1 bulbs, on both bikes i used HID conversion kits.
Blasting around unlit mountain roads at 2 in the morning you need all the light you can get and these things definately deliver!

So there you have it!
One cool custom retro looking bike that will probably go for ever, be easy to maintain, handle well, brake strong , go like stink, not cost a fortune and most definately be the most appreciated and drooled over in ANY car park.
I think number three is going to be even better!!!!!!
Good luck to everyone and happy building..